Releasing basic projects
This tutorial will take you step by step through the process of:
- Documenting changes to a package
- Adding those changes to a changelog
- Updating version numbers
- Creating releases on GitHub
Prerequisites
- Git: The
gitCLI must be available in your terminal. It’s helpful if you know the basics of commits and tags. - A text editor: for editing Markdown and JSON files. Visual Studio Code is a good free choice.
- Familiarity with a command line terminal, like “Terminal” on macOS or “PowerShell” Windows
- A GitHub account (you can use an alternative, but the results will be different)
- Install Knope
Creating a project
Create a new empty directory wherever you like and open it in your terminal.
mkdir knope-tutorial # create a new directorycd knope-tutorial # change into the new directoryInitialize a Git repository:
git initNow open the directory in your text editor and create two files:
# Changelog
This is where the changes in each release are documented.{ "name": "pizza-builder", "version": "1.0.0"}This is simulating a JavaScript package—in a real package you’d have a lot more info in your package.json file,
but version is all that Knope needs.
This package is starting at version 1.0.0,
as you make changes, the version will increase depending on the type of change.
Knope needs a GitHub repository to publish releases. You can create one with the GitHub CLI.
gh repo create --private knope-tutorial --source .Little changes
Start by documenting a small change using a conventional commit.
git commit --allow-empty -m "fix: No longer crashes when you add pineapple"You’ve just documented a bug fix using a commit message!
Knope can give a preview of the next release:
knope release --dry-runExample output from Knope
Would add the following to package.json: 1.0.1Would add the following to CHANGELOG.md:## 1.0.1 (2023-11-01)
### Fixes
#### No longer crashes when you add pineapple
Would add files to git:package.jsonCHANGELOG.mdWould run git commit -m "chore: prepare release 1.0.1" && git pushWould create a release on GitHub with name 1.0.1 (2023-11-01) and tag v1.0.1 and body:
## Fixes
### No longer crashes when you add pineappleAccording to that output, Knope will:
- Set the version of the package in
package.jsonto1.0.1 - Add a new section to
CHANGELOG.mdwith the documented changes - Commit those changes to Git and push to the remote repo
- Create a new release on GitHub
Time to release it for real!
Creating a release
Running the release workflow again without the --dry-run causes Knope to do everything it promised to.
knope release? No GitHub token found, generate one from https://github.com/settings/tokens with `repo` permissions and input hereKnope wants to create that GitHub release, but it needs access to GitHub! Go ahead and generate a token with the link it provided, then paste it into your terminal.
Now that the workflow has complete, the package.json has the new version number:
{ "name": "pizza-builder", "version": "1.0.1"}The CHANGELOG.md has the message from the commit:
# Changelog
This is where the changes in each release are documented.
## 1.0.1 (2023-11-01)
### Fixes
#### No longer crashes when you add pineapple
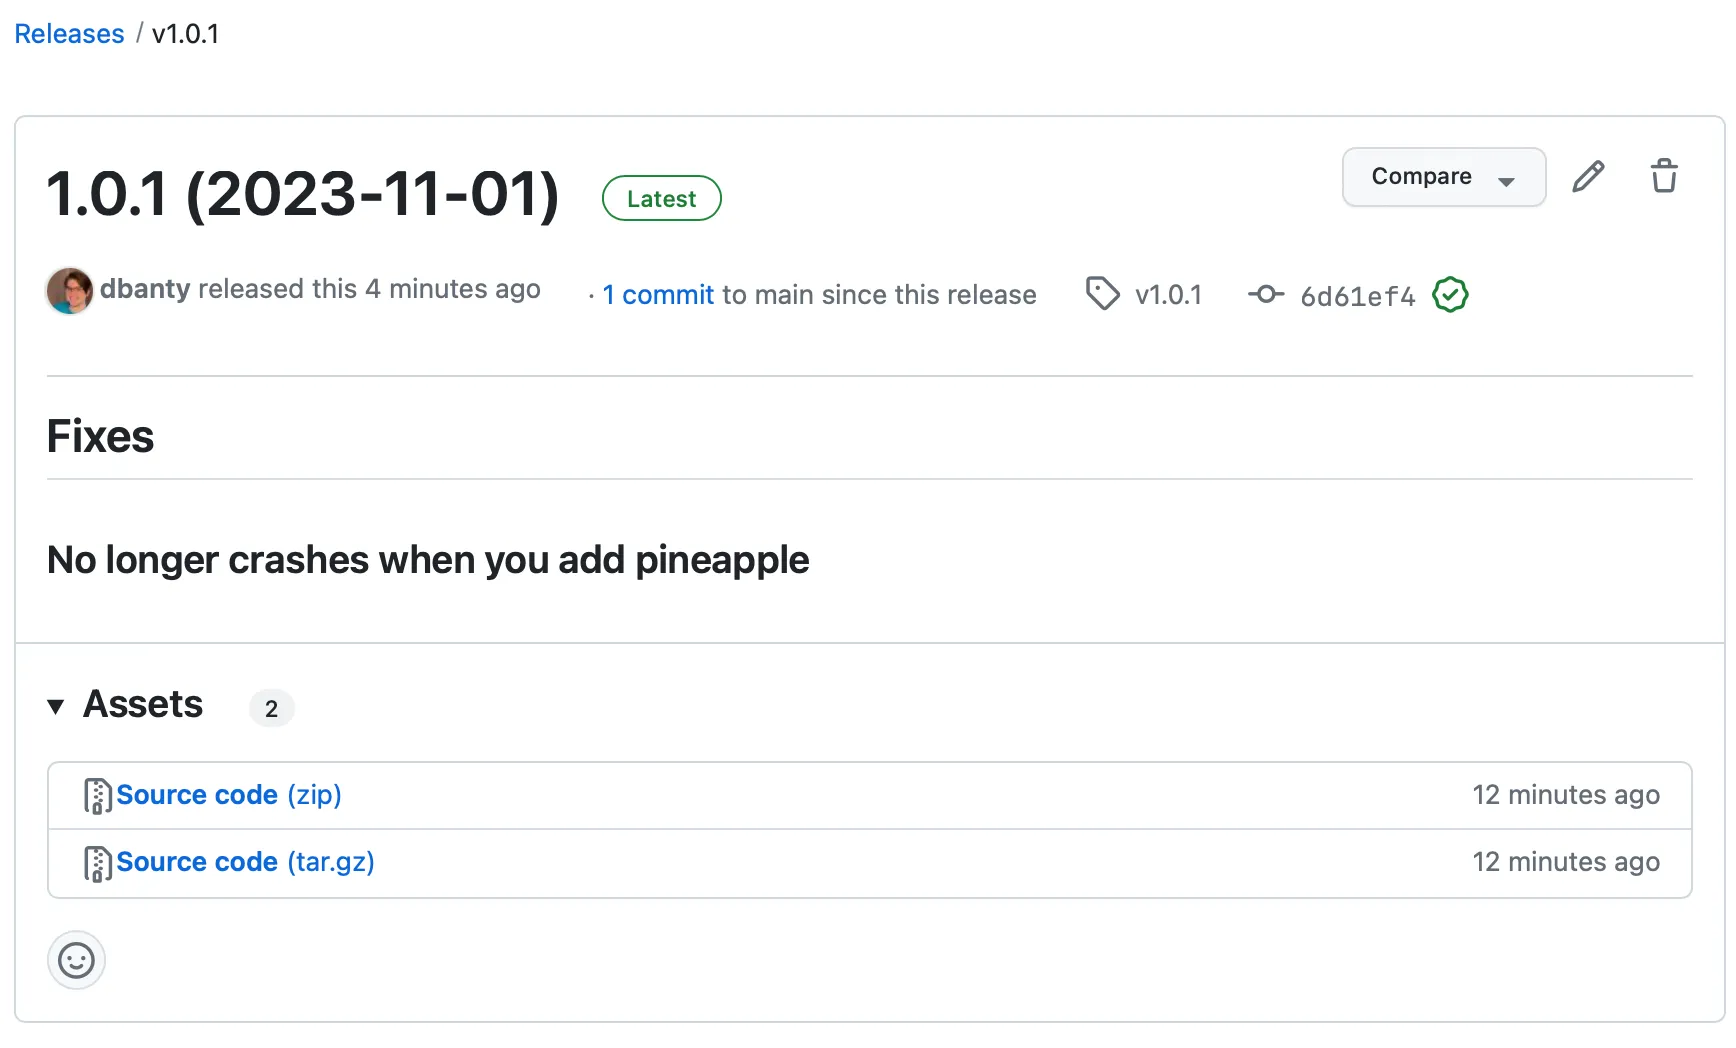
And that same content is in a new GitHub release:
gh release view --web
More complex changes
Conventional commits are great for simple changes, you just start your commit with fix: or feat: .
For changes that take more than a few words to describe, though, changesets are a better fit:
knope document-changeYou’ll get a choice of the type of change.
The terms are from semantic versioning, so minor is what you’ll want for a new feature:
? What type of change is this? major> minor patch[↑↓ to move, enter to select, type to filter]After selecting minor with the enter key, you can summarize the new feature:
> What type of change is this? minor? What is a short summary of this change? Add calzones[This will be used as a header in the changelog]This created a new Markdown file which you can fill in with more details:
---default: minor---
# Add calzones
In addition to building Pizzas, you can now build calzones! Just use the new `--calzone` option!
> Pizza? Never heard of it. That's what people will be saying in 20 years, because pizza is old news. Pizza is your grandfather's calzone.
You can also add a conventional commit into the same release:
git commit --allow-empty -m 'feat: Added the `olives` topping'A dry run will explain what Knope will do:
knope release --dry-runExample output from Knope
Would delete: .changeset/add_calzones.mdWould add the following to package.json: 1.1.0Would add the following to CHANGELOG.md:## 1.1.0 (2023-11-02)
### Features
#### Added the `olives` topping
#### Add calzones
In addition to building Pizzas, you can now build calzones! Just use the new `--calzone` option!
> Pizza? Never heard of it. That's what people will be saying in 20 years, because pizza is old news. Pizza is your grandfather's calzone.
### Fixes
#### No longer crashes when you add pineapple
Would add files to git:package.jsonCHANGELOG.md.changeset/add_calzones.mdWould run git commit -m "chore: prepare release 1.1.0" && git pushWould create a release on GitHub with name 1.1.0 (2023-11-02) and tag v1.1.0 and body:
## Features
### Added the `olives` topping
### Add calzones
In addition to building Pizzas, you can now build calzones! Just use the new `--calzone` option!
> Pizza? Never heard of it. That's what people will be saying in 20 years, because pizza is old news. Pizza is your grandfather's calzone.
## Fixes
### No longer crashes when you add pineapple
Uh oh, Knope is including the fix from the last version! That’s because Knope uses Git tags to figure out which conventional commits to include in a release. The release is on GitHub, but not in the local file system! You can fix that by pulling the tags:
git pull --tagsknope release --dry-runExample output from Knope
Would delete: .changeset/add_calzones.mdWould add the following to package.json: 1.1.0Would add the following to CHANGELOG.md:## 1.1.0 (2023-11-02)
### Features
#### Added the `olives` topping
#### Add calzones
In addition to building Pizzas, you can now build calzones! Just use the new `--calzone` option!
> Pizza? Never heard of it. That's what people will be saying in 20 years, because pizza is old news. Pizza is your grandfather's calzone.
Would add files to git:package.jsonCHANGELOG.md.changeset/add_calzones.mdWould run git commit -m "chore: prepare release 1.1.0" && git pushWould create a release on GitHub with name 1.1.0 (2023-11-02) and tag v1.1.0 and body:
## Features
### Added the `olives` topping
### Add calzones
In addition to building Pizzas, you can now build calzones! Just use the new `--calzone` option!
> Pizza? Never heard of it. That's what people will be saying in 20 years, because pizza is old news. Pizza is your grandfather's calzone.
Much better!
Now that Knope knows when 1.0.1 was, it can ignore the changes from that release.
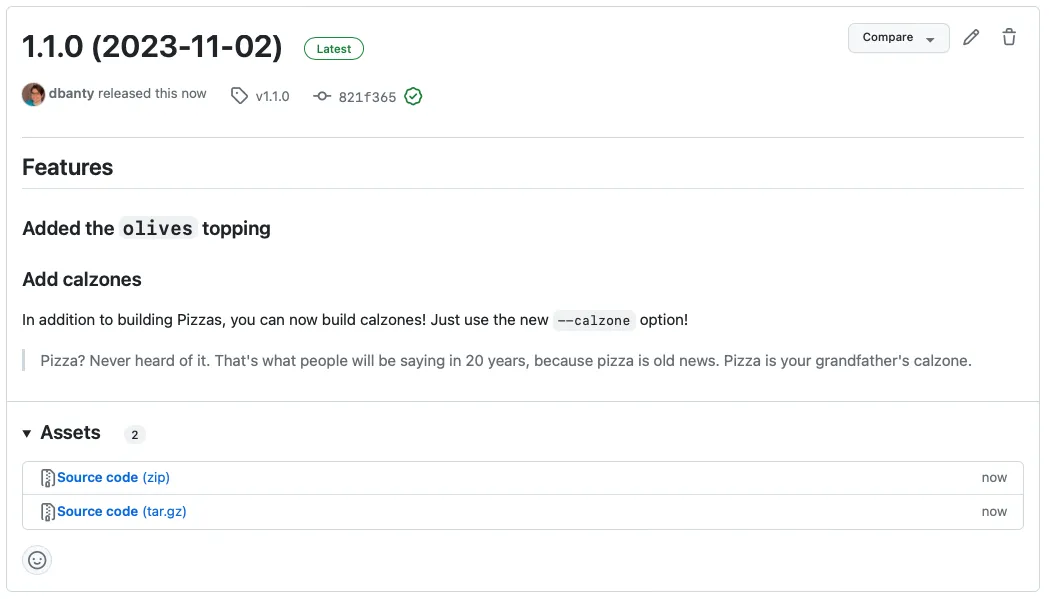
Time to create this release for real:
knope releasegh release view --web
This illustrates one of the big advantages to changesets, you can write as much Markdown content as you need to describe a change. There could be code snippets, screenshots, even collapsible sections!
Finishing up
You’ve done it! You documented both simple changes (with conventional commits) and complex changes (with changesets). Then, you released them by updating the changelog, bumping the version, and creating a GitHub release, all with a single command!
You already have the basic skills necessary to start speeding up your release processes, but you can take it a step further by releasing in GitHub Actions.